top of page
Search
  • Nov 11, 2022
  • 1 min read

Updated: Dec 12, 2022

In this Project, I am looking to develop a Laravel web application for contact list and host it on a public web server. The project has two aspects: technical and blog content.


The technical aspects contain:

  • CRUD functionality for user

  • dashboard for admin

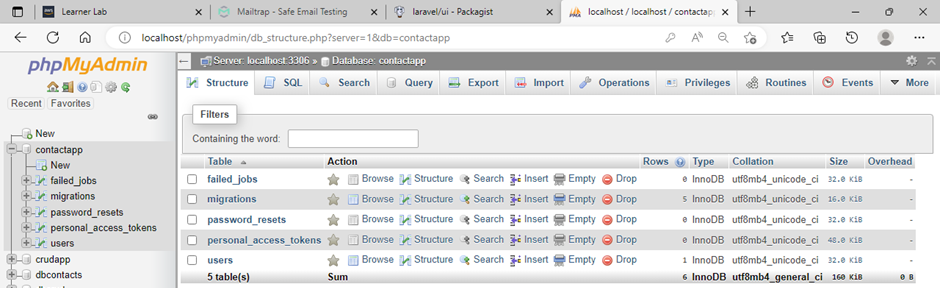
  • Model (DB design and validation rules) for Users and Contacts

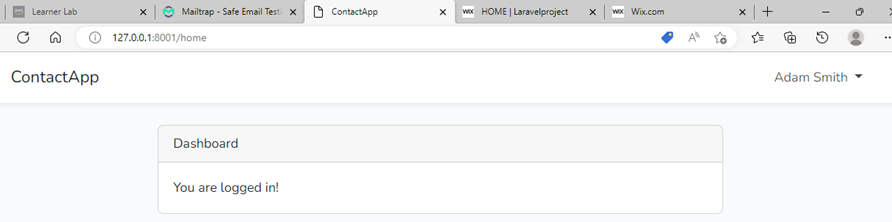
  • User accounts, authentication and authorization

  • Use of other specialised techniques

  • User interface techniques and improvements

  • deploying the Laravel web in a public server

  • Aesthetic design, layout, CSS

The second part of this project is blog content, I have created this online blog and will be using it to demonstrate project achievements, highlight the problems that I will face through the project development and deployment, and cover proposed solutions for bugs and problems.


Development Environment

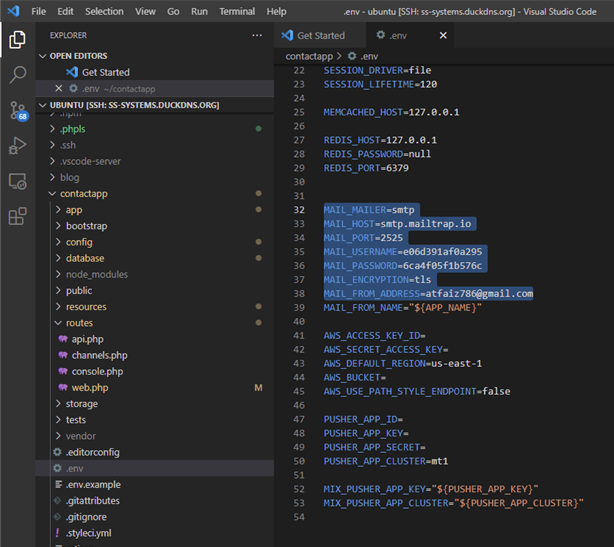
To develop the project I will use Amazon Web Services (AWS) cloud platform, specifically the EC2 (Elastic Compute Cloud) instance which provides scalable computing capacity as well as the Linux operating system and Apache2 web server. Beside these technologies, I am going to use PHP, MariaDB for database propose and phpMyAdmin tool to administrate the MariaDB over the web. As it is a Laravel project I need to install the Laravel Composer and other tools of it.


  • Nov 10, 2022
  • 2 min read

Updated: Dec 12, 2022

Step 1 - Create Project

Before creating laravel application ensure php and composer are installed.

Type the below command at the terminal to create contactaap laravel aplication.

laravel new contactapp


After the project has been created, it is ready for development.

cd contactapp – lead to application folder


Step 2 - set up database details in .env file

.env file - It is Laravel default file that contains environment setup such as database credentials, cache and drivers. These values are then retrieved from various Laravel configuration files within the config folder.


I have opened .env file and I added the database credential as you can see in below image.

ree

Step 3 - Install Laravel UI

Laravel provides tools that allows users to implement authentication quickly, securely and easily. Laravel 8 mostly offer packages like Laravel breeze, Laravel Fortify and Laravel Jetstream. However, I am going to use Laravel Ui package for authentication in this project.


Laravel/ui package easily scaffold all routes and views for those in need of authentication; it also generates several pre-built authentication controllers that handle different requests.

To install the Laravel/ui, I have typed the below command into the terminal inside contactapp folder.


composer require laravel/ui


to make sure Laravel/ui is installed, I have typed the command below in terminal.

composer show laravel/ui

ree

Step 4 - Creating Auth Scaffolding


php artisan ui bootstrap --auth

php artisan ui vue --auth

php artisan ui react --auth


I have more than one option but, for this project, I am going to use bootstrap

php artisan ui bootstrap --auth This way I will create bootstrap scaffolding.


Through php artisan ui bootstrap --auth Laravel/ui package scaffolded all of the routes and views that I needed for authentication and put them in the resources/views/auth directory.

ree

Laravel/ui also created application layout and placed it in resources/views/layouts.

ree


Step 5 - run npm install and npm run dev command


npm install && npm run dev


npm run dev is an alias for the npm run development command. It is used to compile the JaveScript and CSS files written for application.


Note: sometimes the command fails to fulfil the action. In this case, the solution is to retype and try again and it will work.


Step 6 - Database Migration

The Laravel Schema facade provide comprehensive support for database in order to create and manipulate tables across all of Laravel database systems. Laravel migration is very handy, without get to database console or run any SQL queries the user can quickly delete and recreate tables. the migration structure include two methods up and down. the up method is using for add new table or columns into database, while down method reverse the operations performed by the up method.


By typing the below command, Laravel itself creates the user's table, password_reset table, personal_access_tokens table and few other tables.


php artisan migrate


ree

Middleware

Middleware's are in the app/Http/Middleware folder. Laravel framework carry several middleware including for authentication and CSRF protection. Middleware inspect and filter HTTP requests entering application. It verifies the user authentication; however, if the user is not authenticated then the user will be redirected to login page.

ree


Updated: Dec 13, 2022

Laravel/ui package generates various pre-built authentication controllers as well as layout view, registration, and login views. It also generates HomeController to handle post-login request to application dashboard.

Many web application require users to verify their email address, In the older version of Laravel the user has to manually do the email verification; However, after version 5.8 Laravel always provide in-build setup of email verification.

ree

LoginController – handles authentication


ree

RegisterController – handles new user registration


ForgotPasswordController – handles e-mailing links for resetting passwords

ResetPasswordController – handles reset passwords


ree

verificationController - handle email verification for user newly registered.


Laravel provide built-in services for sending and verifying email verification request.


Model set up

At the user model import the Illuminate\Contracts\Auth\MustVerifyEmail, then add implements MustverifyEmail in user class.

ree

After changes, newly registered users will automatically receive email which contain an email verification link.


Route

App\Providers\RouteServiceProvider is one of the key service provider that loads the route files contain within routes directory. once all service providers have been registered, the router handed off the request for dispatching to controller as well as run any route specific middleware.

middleware filtering HTTP requests, if the user being authenticated middleware verify it, then the route or controller method will be implement and response.


Auth::routes(['verify'=>true]);

ree

At web.php pass an array to tell the route email must be verified.


From App\Http\Controllers;


$this->middleware(['auth', 'verified']);

ree

Pass an array to tell middleware to make sure user authenticate and their email must be verified.


Mailtrap – email testing tool

Mailtrap email delivery platform provides a fake SMTP server for testing purpose to view and share emails, and test with real data without the risk of spamming. Mailtrap catches all the test message and keeps them in its inbox, After inspecting spam score, CSS, HTML and more, the developer can use email API or SMPT relay to send emails.

ree

This is done by copying above values and paste them in .env file configure the mailing configuration.

ree

For better performance optimize the framework.

php artisan optimize or php artisan optimize:clear


now let's test the email verification.

By using php artisan serve command the application will accessible in browser at http://localhost:80000.


ree

Register new user.


ree

When users register, before getting to dashboard, they need to verify their email address.


ree

As you can see in the above image, email verification has been sent to mailtrap.

ree

After user verifying the email address the user will get to dashboard.


Thanks for submitting!

© 2023 by DO IT YOURSELF. Proudly created with Wix.com

bottom of page